Check back soon
Once posts are published, you’ll see them here.
This blog documents the progression of the studio 4.1 model making workshop, where students are asked to experiment with model making techniques. The blog is a continuous documentation which will serve as a reference for the future for the techniques learned. Two models were created in the workshop and documentation of the process can be found on this page and the 'UoM Model' page. See link above.
This task required creating a model of an everyday object out of white card. The intention of this task was to learn about how the essence of an item can be translated with a different material. Lessons about dimensioning, crafting and precision were also learnt.
We were set this task to assess our ability to interrogate an object and study how it is constructed. The task also aimed to teach us about how to interpret an object and construct it through a different technique. The white card dictated that we were precise and careful with our measuring,cutting and gluing techniques.
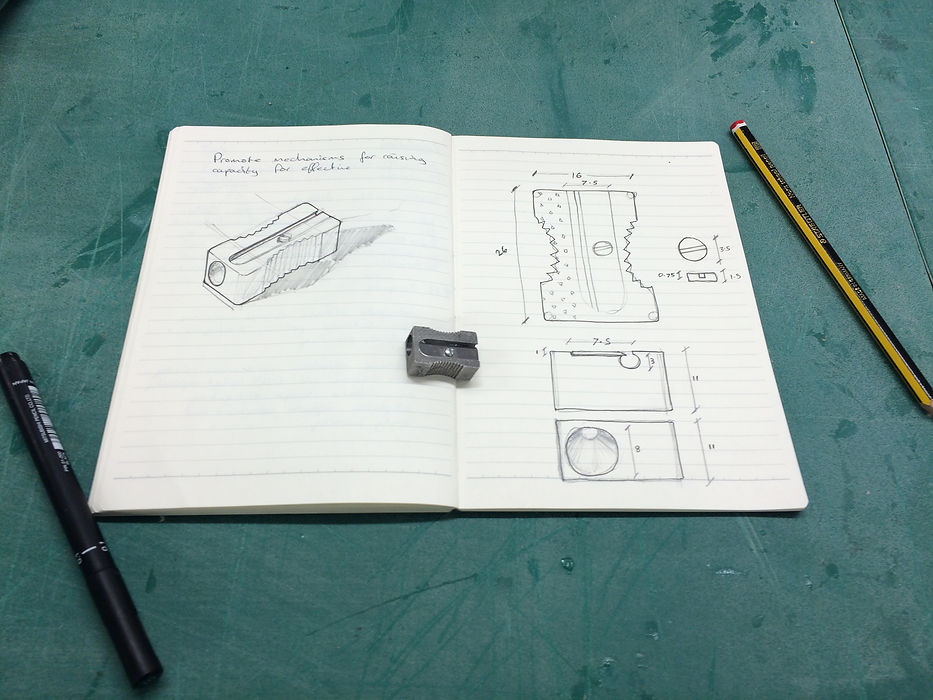
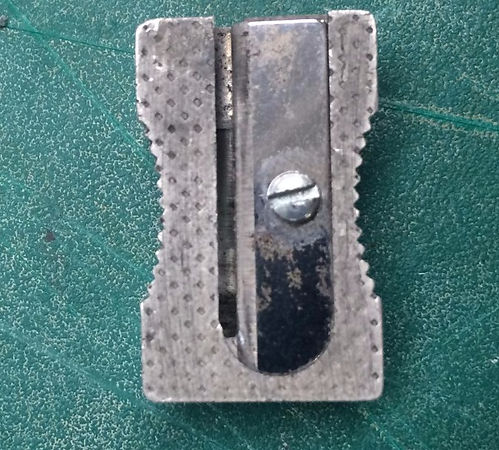
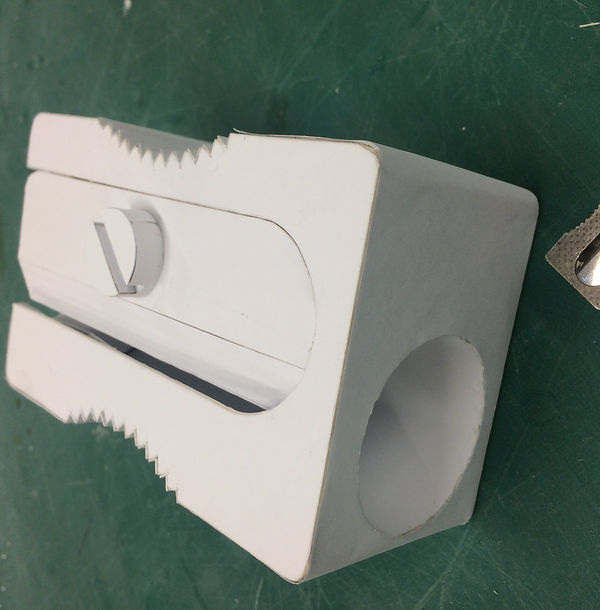
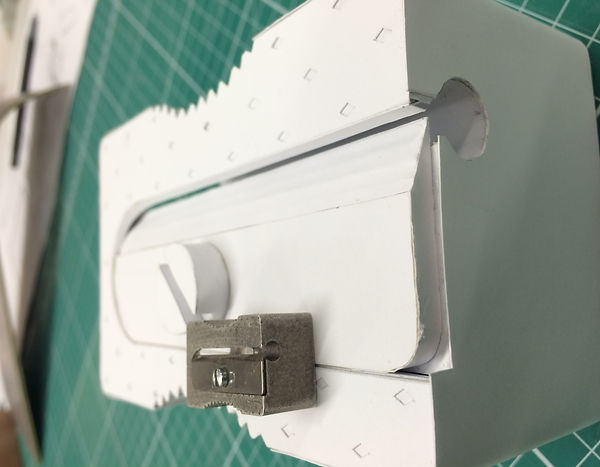
I chose to model a sharpener. I chose this object because despite looking like a simple object it had lots of detail when carefully observed. I also wanted an object that was recognizable so that when scaled up people would recognise it as an enlarged object.
I planned to construct the model at a 5:1 scale. My plan was to create the form to an exact scale and then to use that object to reference constructing the detail so that it was accurate. To make accurate measurements of the sharpener I used some vernier calipers. These allowed me to measure interior distances and depths where a ruler would not.
Experiments with techniques allowing the card to curve. I discovered that scoring the inside allows the card to have a smoother exterior curve.


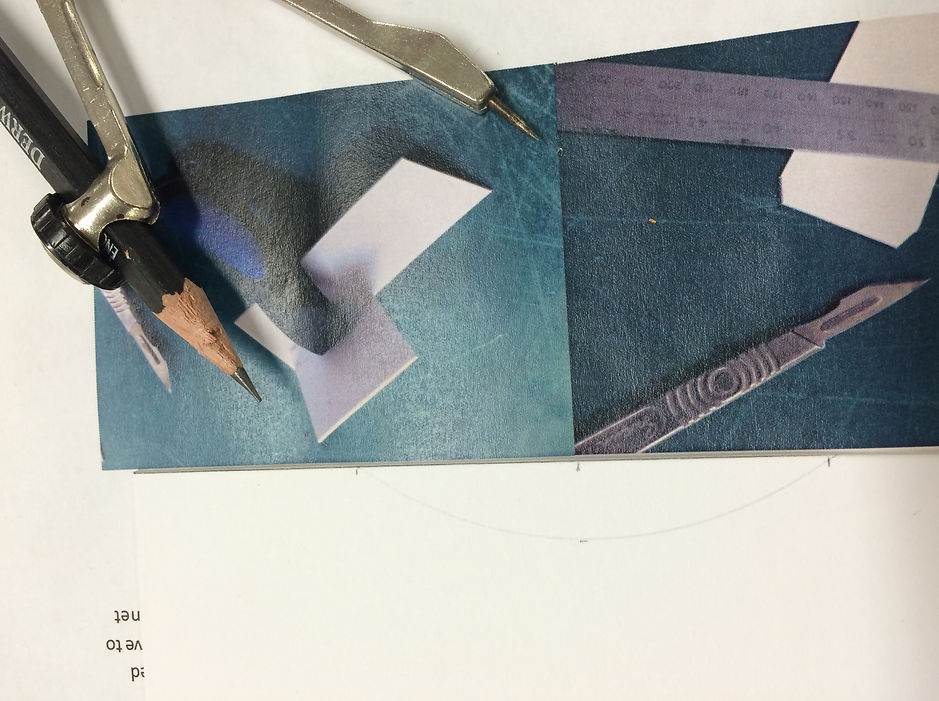
To get a consistant radius for all pieces of card, I used a piece of paper and used the straight lines as construction lines. The paper allowed me to keep the angle of the compass saved. The image shows a radius drawn on the card, the photos below that are printed onto the paper and used as construction lines. The hole pierced throug the paper saves the position of the compass.
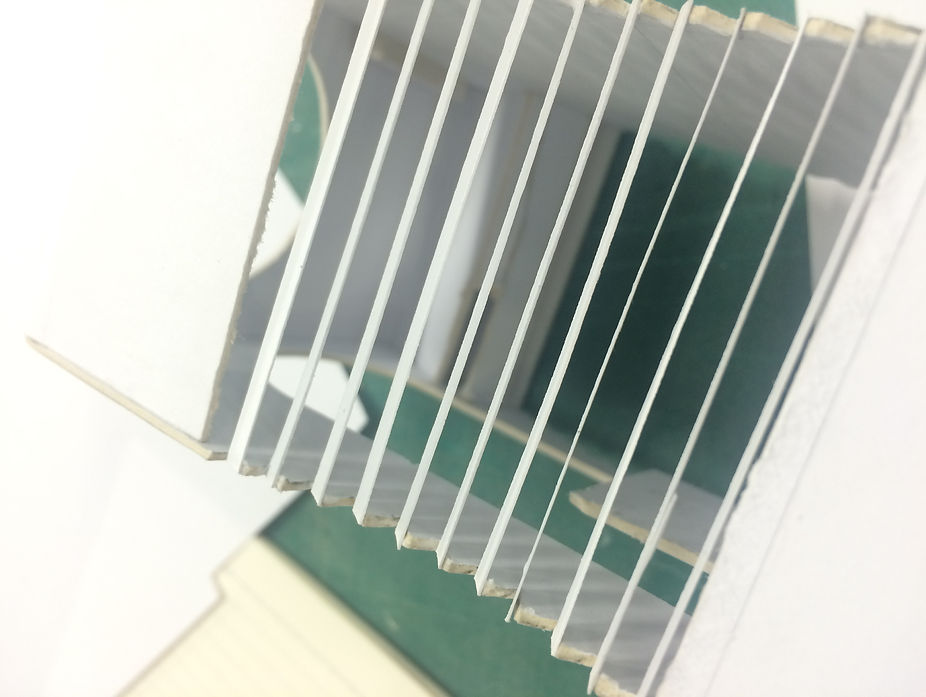
To recreate the grip edge of the sharpener I attempted to estimate the intervals of the serations. This rough technique did not yield the precision I was attempting and I chose to measure out the serations instead.


The new technique for creating the grip has yeilded a more accurate spread of triangles. I then rounded them off because the grip is actually small rounded strips. My plan is to drape paper over the form and press into the divots to create the smoothed grooves.

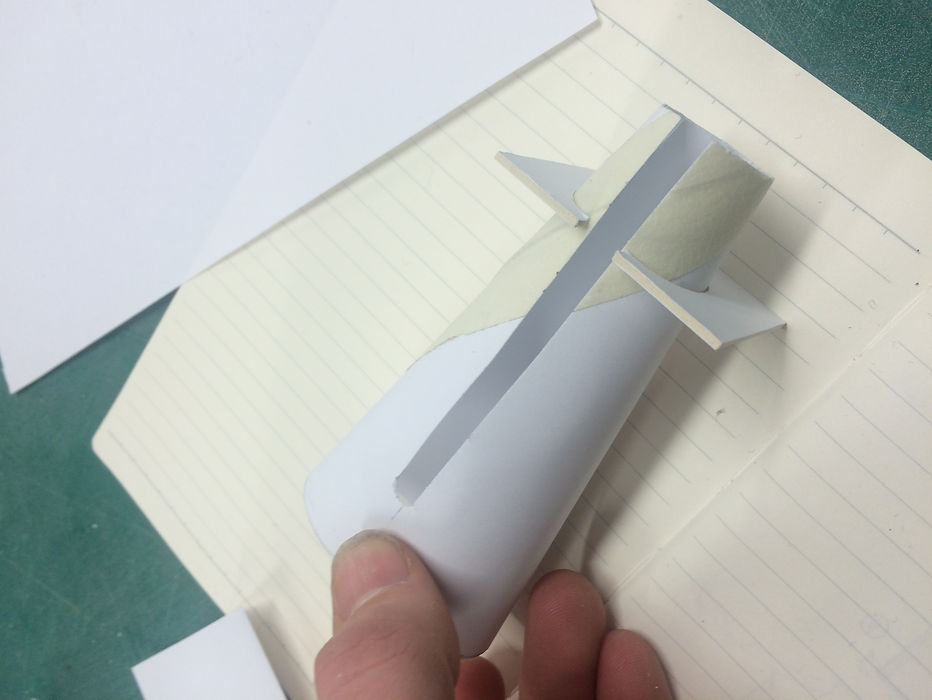
I added some structure into the model which will allow me to fix both face in position and drape the paper over the grip.

I attempted to fold the paper into the divots and found that the folds did not form clean bends. It also was difficult to do the backward fold necessary for the grip.

I tried to pre fold the paper. Whilst this technique created the clean lines I was after it did not fold into the triangles all the way down the curve. The triangles are not completely uniform because of inaccuracies in cutting. This is a fault with the design and in future I would recreate the grip in a different technique. However in this current project I do not have time to re do the model.
The comprised technique I developed was to ct individual strips which were then glued at two points. Whilst this technique is not as true to the real object, it does give the idea of a grip and so I deceided to keep it.

I cut out the circular profiles that would line up with the cone interior. I realised too late that my knife blade was not sufficiently sharp enough and it made the edge of the card rough. Having stuck the piece down already it was unable to easily change the piece without redoing most of the model. I changed my blade and proceeded. I plan to cover the outside with paper to clean up the surface.
I made a shelf at the correct size to hold the razor element.
The razor was created out of stepped strips of card and topping it with smooth paper to give the sharp edge.


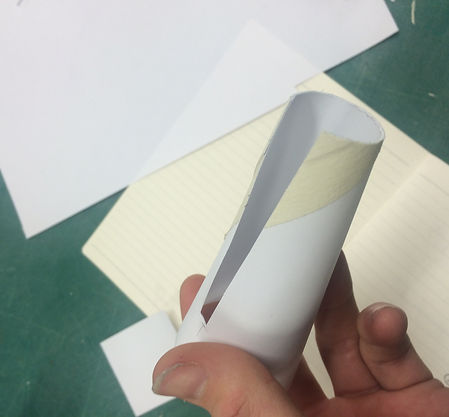
For the interior cone element I planned not to measure it but let the two holes at the end determine the dimension. I created a cone which expanded into the gap which I then taped into position and recorded the position with pencil marks. I used a 'sharp' scalpel to remove the edges of the cone.


The shapener has a bifuricated cone so that the lead does not snap off in the shapener. I cut the dimensions of the interior cones and used a support strucure to glue them in place.

To create the screw head I used card for the structure and paper for the rounded elements so that it gave a smooth curvature


Similarly to the screw head, I used paper to cover the exterior form to neaten it up. In hindsight I should have used a higher density paper so that it gave a smoother finish.
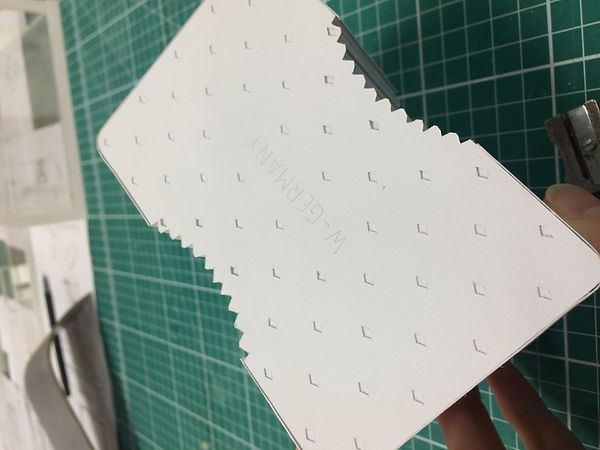
To create the grip on the shapener I used a computer to measure out a matrix of diamonds and then cut them out with a scalpel.


Lessons:
- Test pieces and techniques before commiting to the model.
- Every material has specific properties and it was learnt that there is a considerable difference between the paper and cards. As a designer/model maker it is important to have an understanding of the material properties to elevate the design/model.
- With more time I would redo the grip with a different technique as I think this is the weakest part of the mode. In addition I would ensure that all cuts I make are accurate and with a sharp knife so that the model looks clean and crisp.
- It is important to have sharp knife to ensure a clean cut.